
How To Make the Infinity Stones Filter
AVENGERS, ASSEMBLE!!!..to make this filter right quick.
This filter was really fun (and frustrating) to make. It required some knowledge of math, experience with 3D manipulation, and a touch of good luck.
The final result looks like this (you can try it out here on Luke’s profile and throw him a follow!):
We see the six infinity stones orbiting (not rotating) around the users head.
When the user nods, the background goes dark (Thanos purple), thunder strikes, and the stones orbit super fast.
Some of these steps are really easy to do in Spark, but others are quite tricky. Let’s go through each major step one by one.
What You’ll Learn:
- Where to get the stones (all the cool kids know)
- Occluding objects
- Using a unit circle in 3D
- Iris Tracking (Look Ma, No Template!)
- Making stuff happen when the user nods
Hey Kid, Want Some Infinity Stones?
SparkAR includes a wonderful integration with Sketchfab, a 3D marketplace with free models. To get into the Sketchfab library, simply hit the “Import from AR Library” button.
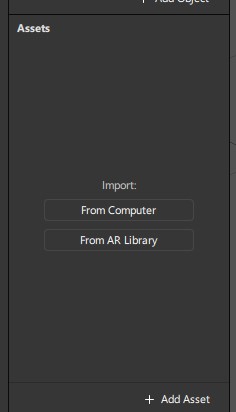
Import button for the AR Library
I typed in “Infinity Stones” and chose one that looked promising. The objects are physically-based meaning that they react to light from the environment. I didn’t want them to be affected by the directional light so much, so I changed their render method to standard which gives access to the specular field (changes how “shiny” the render is). I used this to make the stones look like they were glowing from the inside.
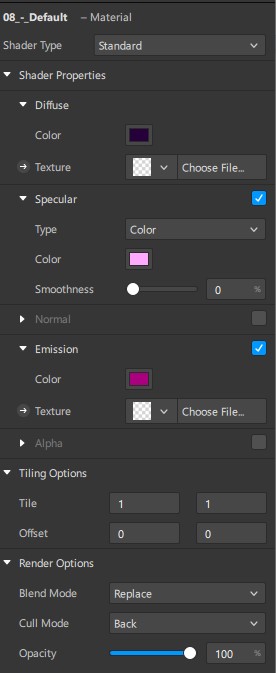
Set the settings like ‘Specular’ for your Infinity Stones
There’s no science to this. So far when I’ve been importing 3D renders I kinda just play around until I find something that looks good. Play around and find what you like!
Occlusion and You
Now that we have our stones, our next step will be to get them to orbit around the head.
In order to sell this effect to the user, we need to have the stones “disappear” when they go behind the head.
Movin Stuff to Our Global Assets
In order to do this, we can use the occluder included in Spark. We can get the fbx (3D object) files for the head and bust occluder by copying the files from the Necktie template. Right click on the headOccluder and select Reveal in Explorer.
Copy the file path from the ‘Reveal in File Explorer’ Option
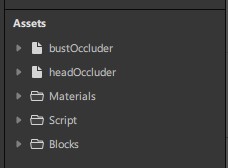
I copied these into my global assetsfolder, so I could use them in any project.
My Own Assets Folder. Your’s will probably look different!
To add the headOccluder, simply add a new FaceTracker and drag it into the source as a child of the FaceTracker.
FaceTracker > HeadOccluder
The Null Object
Next, we need to create a Null Object and also make it the child of our Face Tracker. Why? This object will serve as the center of our rotation.
Move the null object to the “center” of the head occluder (mine actually ended up being a little farther back in the head.
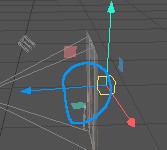
Play around with the position of your null object!
Then, we need to add the stone 3D objects we imported earlier as a child. Move these objects to positions “outside” of the null parent. We do this by changing the z parameter.
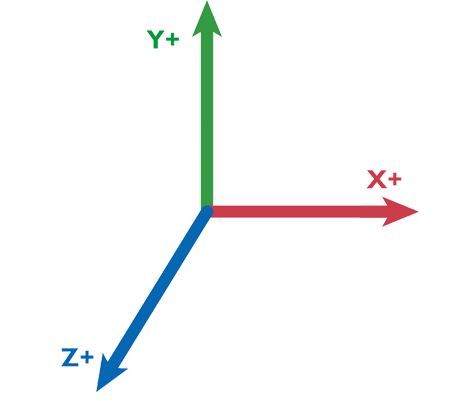
The 3D axis used in pretty much all 3D software.
To animate it around the head, we add a rotation animation in the patch editor. We make it linear and go from 0 -> 359 around the y-axis.
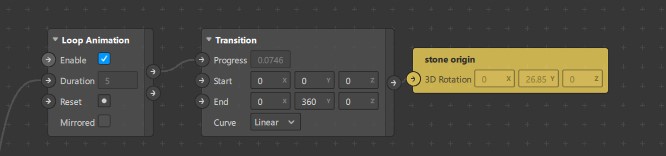
We rotate from 0 -> 359 cuz that’s a full circle!
Great! One down, five to go!
The Unit Circle (My Own Personal Hell)
In order to be able to position these six stones equidistant from each other, we’re going to use math to our advantage.
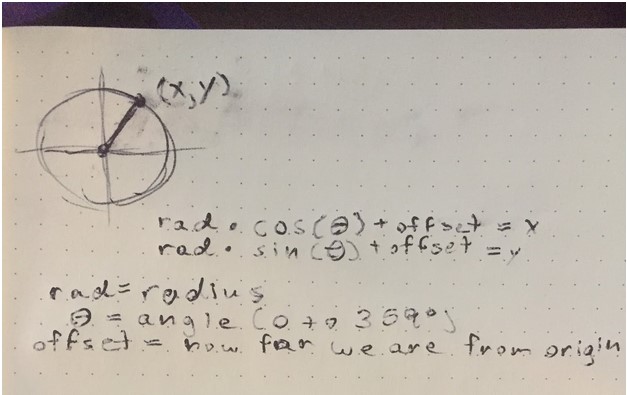
A picture of my unit circle notes in my journal
In order to get a (x,y) position, we can use the unit circle equation:
x = radius * cos(theta) + offset
y = radius * sin(theta) + offset
Where theta = angle on the circle from 0 to 360 degrees (in radians) and offset = how far away we are from (0,0) (not the rapper, sorry).
Since we’re working in 3D, the circle is actually on the (x,z) axis since y controls how high or low we are on the face. You can think of it like a pizza chef spinning a pizza.
The Python Script
Since there are six infinity stones, we divide 360 / 6 to get that each stone should be 60 degrees apart. I was too lazy to find the results for each stone, so I created a Python script to do it.
import math
rad = .2
xOff = 0.0
zOff = 0.0

print("Yellow x: ", rad * math.cos(math.radians(0)) + xOff)
print("Yellow z: ", rad * math.sin(math.radians(0)) + zOff)
print("--------------------------------------")

print("Red x: ", rad * math.cos(math.radians(60)) + xOff)
print("Red z: ", rad * math.sin(math.radians(60)) + zOff)
print("--------------------------------------")

print("Blue x: ", rad * math.cos(math.radians(120)) + xOff)
print("Blue z: ", rad * math.sin(math.radians(120)) + zOff)
print("--------------------------------------")

print("Orange x: ", rad * math.cos(math.radians(180)) + xOff)
print("Orange z: ", rad * math.sin(math.radians(180)) + zOff)
print("--------------------------------------")

print("Pink x: ", rad * math.cos(math.radians(240)) + xOff)
print("Pink z: ", rad * math.sin(math.radians(240)) + zOff)
print("--------------------------------------")

print("Green x: ", rad * math.cos(math.radians(300)) + xOff)
print("Green z: ", rad * math.sin(math.radians(300)) + zOff)
print("--------------------------------------")
My xOffset and zOffset are both zero cause the origin is (0,0) (that’s what the stones think at least!).
The radius is variable, but I found that anything greater than 0.2 wasn’t great because the stones flew way too close to the camera.
The final step is to drag each of the six stones into place by copy/pasting the result into the position field of the stones.
Ok, enough math, let’s get back to something more fun.
Nod Interactions
The final step is to add some flourish to the effect. Obviously, the sky’s the limit as to what you could do, but I decided to make the stones orbit quicker and to make the eye texture change to look like Thor in that one scene where he joins the battle in Infinity War (is that a spoiler? If so, sorry)
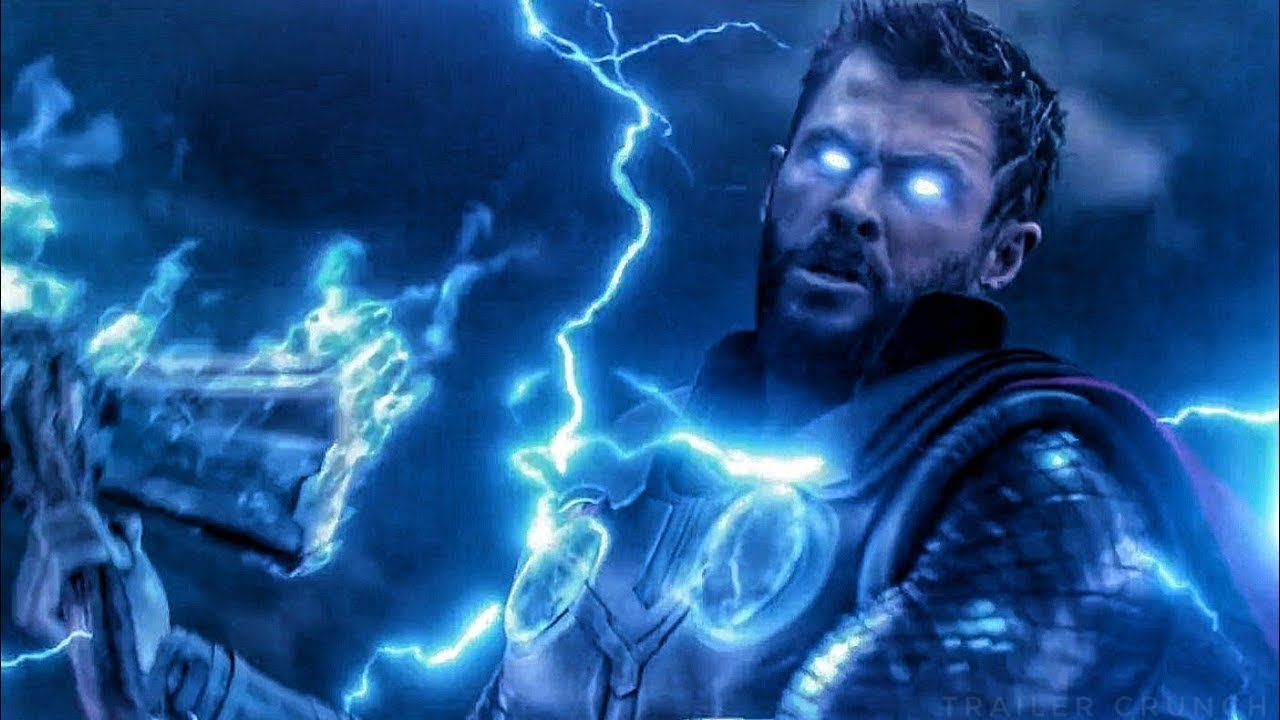
BRING ME THANOS!
How to get Them Eyes!
In order to get the Iris Tracking effect, we can follow a similar workflow to how we got the headOccluder object. Open a new Iris Tracking project template and copy the Eyeball object into your global assets folder.

Eyeball > Eyeball. Eyeball-ception
Import the Eyeball into the project and create two instances: LeftEyeball and RightEyeball.
For each eyeball, use the patch editor and the Face Tracker to attach them to the positions and rotation of the eyeballs (we know where you’re lookin!!)
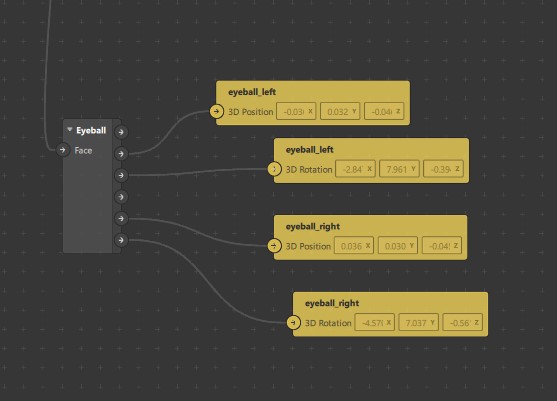
We need to track rotation and position to sell the effect.
Import the Eyeball Shader from the AR Library, and color to taste.
Fast Rotation
To speed up the rotation of the effect, I simply made a if/else patch that controls the duration of the animation. I also used the same trigger to have all of the effects become visible or not.

Go faster, rocks!
Conclusion
That’s it! If you sat through this, you are a true Avenger. Iron Man would be proud. To sum up, we learned:
- how to import 3D objects from SparkAR templates
- how to use a Head Occluder, how to rotate a 3D object around a null origin
- how to use the unit circle to evenly place things in space
- how to add cool eye tracking effects on a trigger
Thanks for reading ✌️, and hit that RSS feed if you wanna see more stuff like this.